Difference between revisions of "Visual guide to allocating RAM"
From Pixelmon Wiki
m (Implementing some feedback.) |
(Draft for a Technic Launcher addition.) |
||
| Line 2: | Line 2: | ||
== Minecraft launcher == | == Minecraft launcher == | ||
| − | {|class="mw-collapsible wikitable" | + | {|class="mw-collapsible mw-collapsed wikitable" |
|- | |- | ||
! Step | ! Step | ||
| Line 30: | Line 30: | ||
|} | |} | ||
| − | Your allocation is now set, and the game | + | == Technic launcher == |
| + | {|class="mw-collapsible mw-collapsed wikitable" | ||
| + | |- | ||
| + | ! Step | ||
| + | ! class="unsortable" | Example | ||
| + | |- | ||
| + | |style="text-align:center"|Start theTechnic launcher. | ||
| + | | [[File:techniclauncher.png|frame|none|597x359px]] | ||
| + | |- | ||
| + | |style="text-align:center"|Click on "Launcher Options". | ||
| + | | [[File:technictutorial1.png|frame|none|597x359px]] | ||
| + | |- | ||
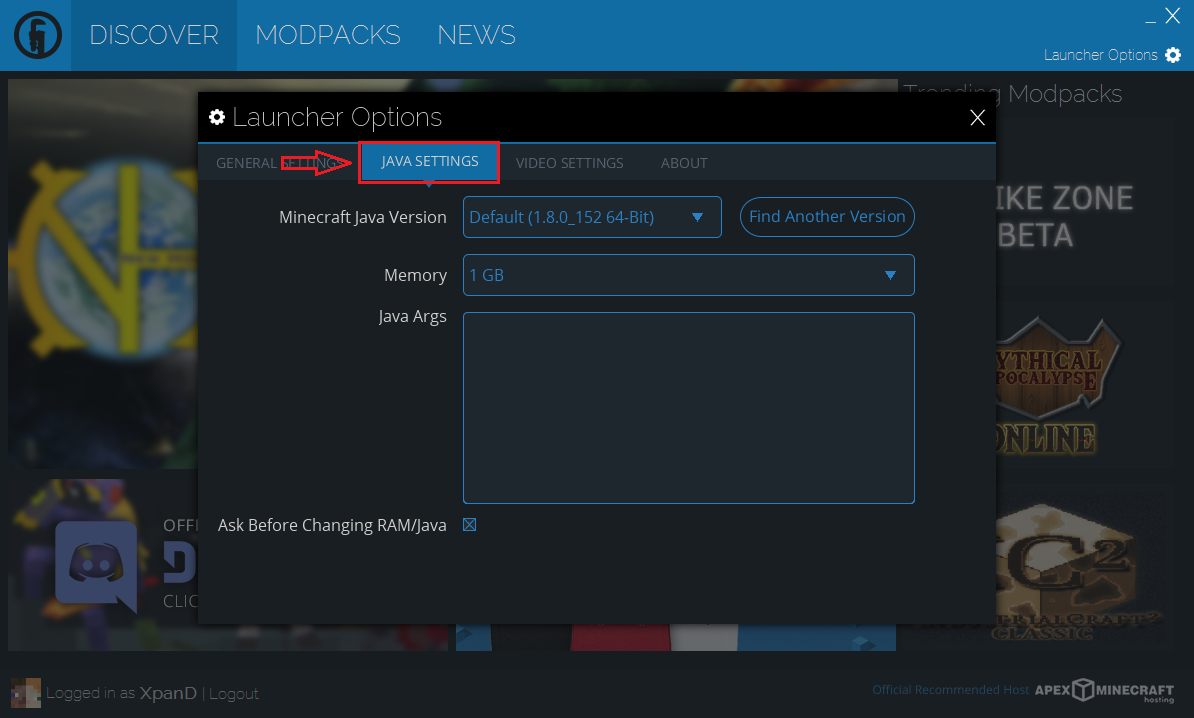
| + | |style="text-align:center"|Click into the "JAVA SETTINGS" tab. | ||
| + | | [[File:technictutorial2.png|frame|none|597x359px]] | ||
| + | |- | ||
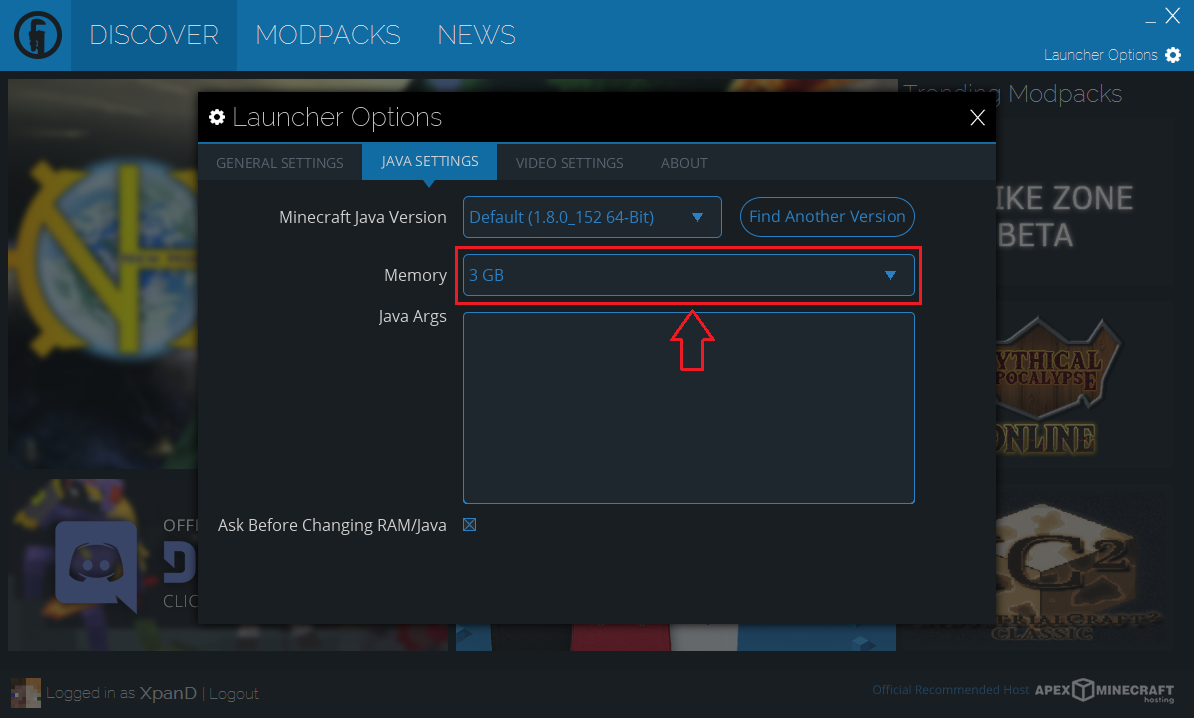
| + | |style="text-align:center"|Click into the "Memory" box and pick a higher setting. | ||
| + | | [[File:technictutorial3.png|frame|none|597x359px]] | ||
| + | |- | ||
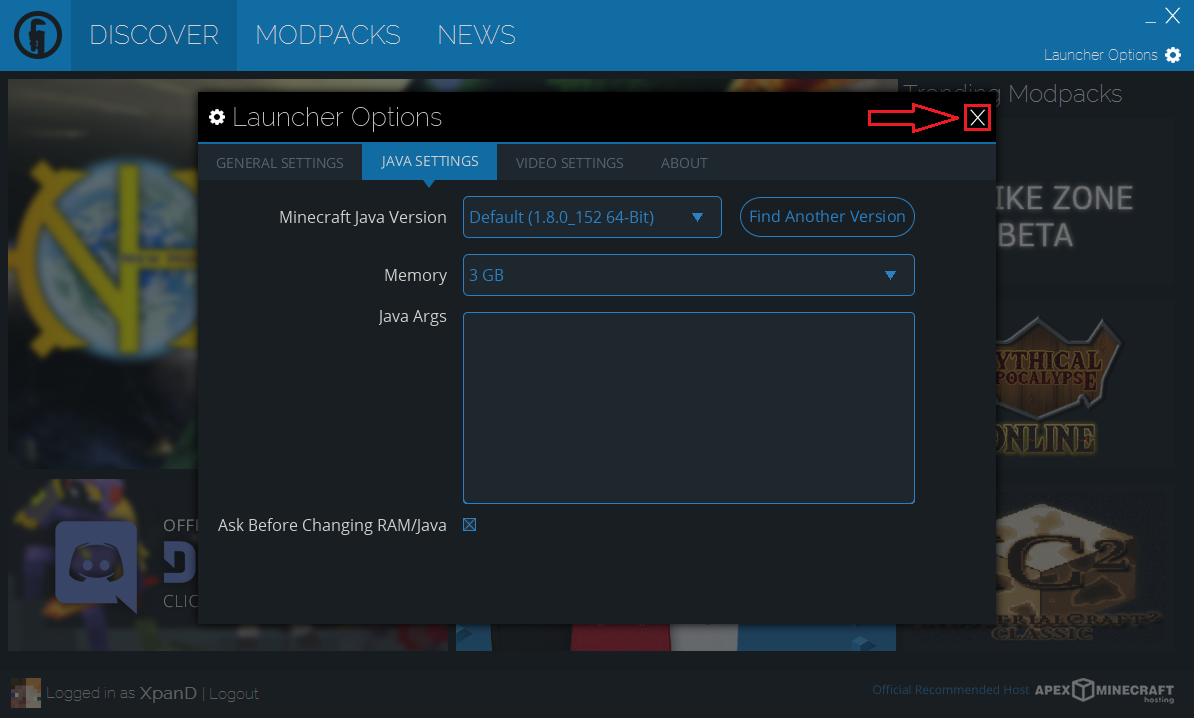
| + | |style="text-align:center"|Click the "X" at the top right of the options window. | ||
| + | | [[File:technictutorial4.png|frame|none|597x359px]] | ||
| + | |} | ||
| + | |||
| + | Your allocation is now set, and the game should now be ready! If your launcher is not letting you allocate more than 1GB, get a 64-bit Java download for your operating system from [https://java.com/en/download/manual.jsp here], and then restart your launcher. | ||
| + | |||
| + | If you get stuck on any of these steps or you are having trouble finding the right amount to allocate, feel free to ask for help in the official [[Pixelmon Discord]]. | ||
Revision as of 09:11, 11 January 2018
By default, Minecraft gives its clients 1GB of memory to work with. Pixelmon requires a bit more to work smoothly; 1500MB at minimum, with 3GB often being considered ideal. If you're experiencing a lot of lag or the game is not starting, try using this quick guide to change the allocation.
Minecraft launcher
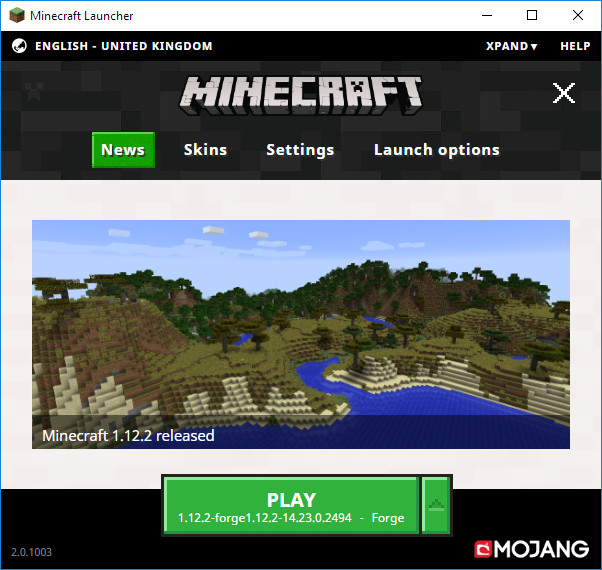
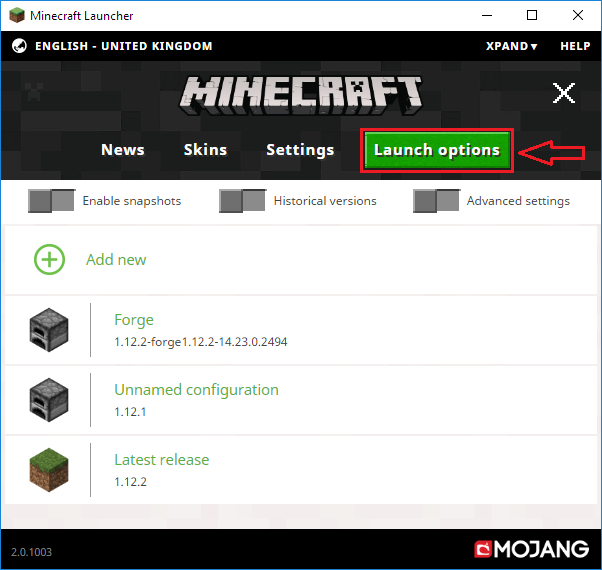
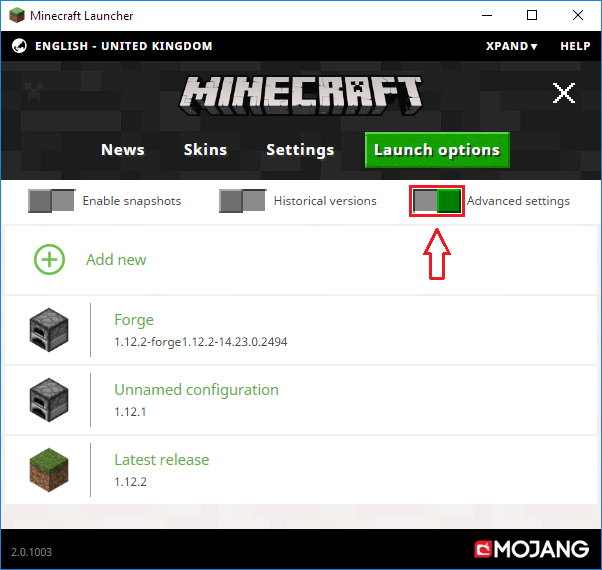
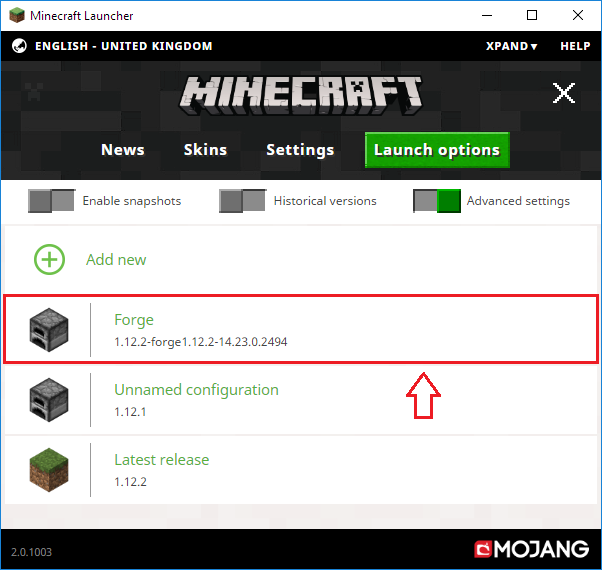
| Step | Example |
|---|---|
| Start the Minecraft launcher. | |
| Click on "Launch options". | |
| Click on "Advanced settings". | |
| Click on your Pixelmon Forge profile. | |
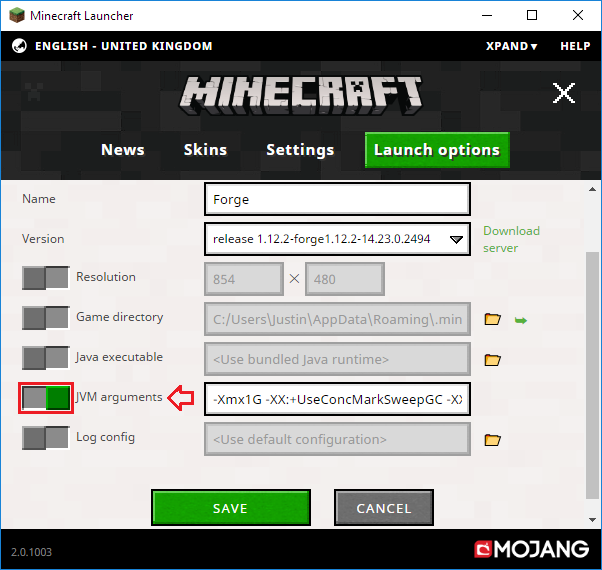
| Click on "JVM Arguments". | |
| Replace "-Xmx1G" with a higher amount,
such as "-Xmx3G" (or "-Xmx3000M") |
|
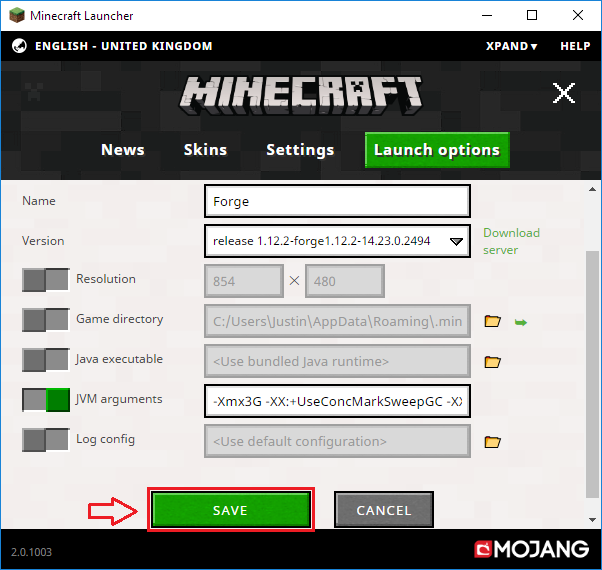
| Click "SAVE" to save your settings. |
Technic launcher
| Step | Example |
|---|---|
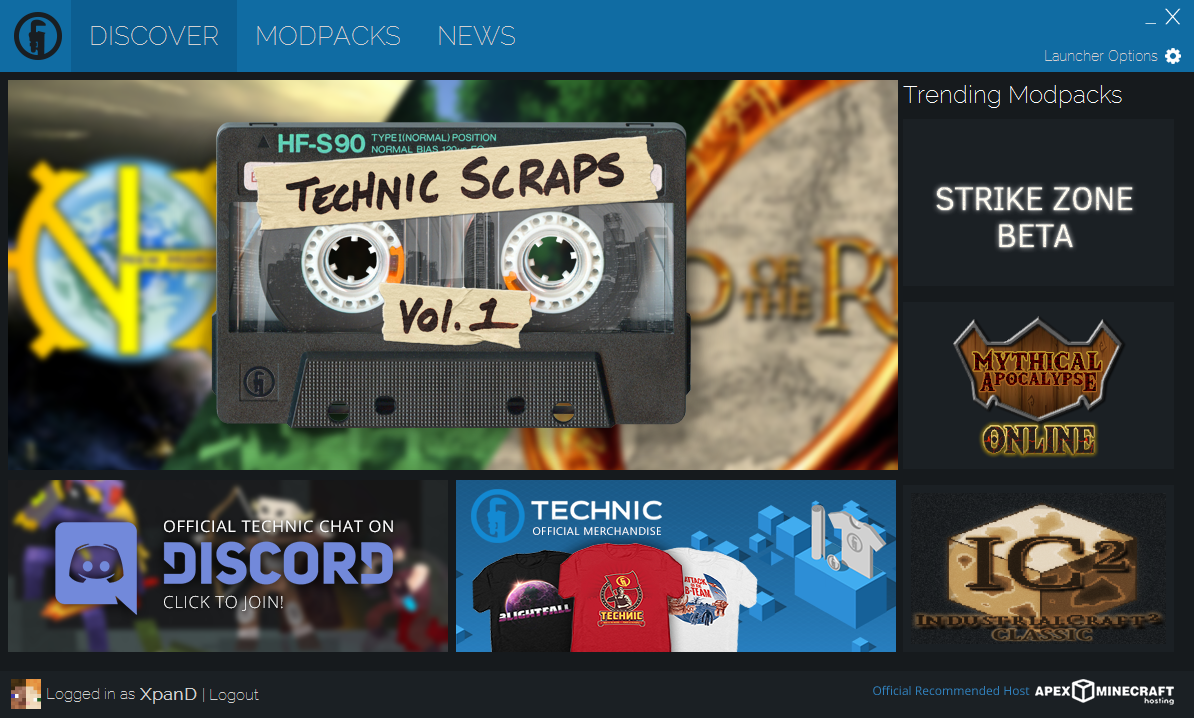
| Start theTechnic launcher. | |
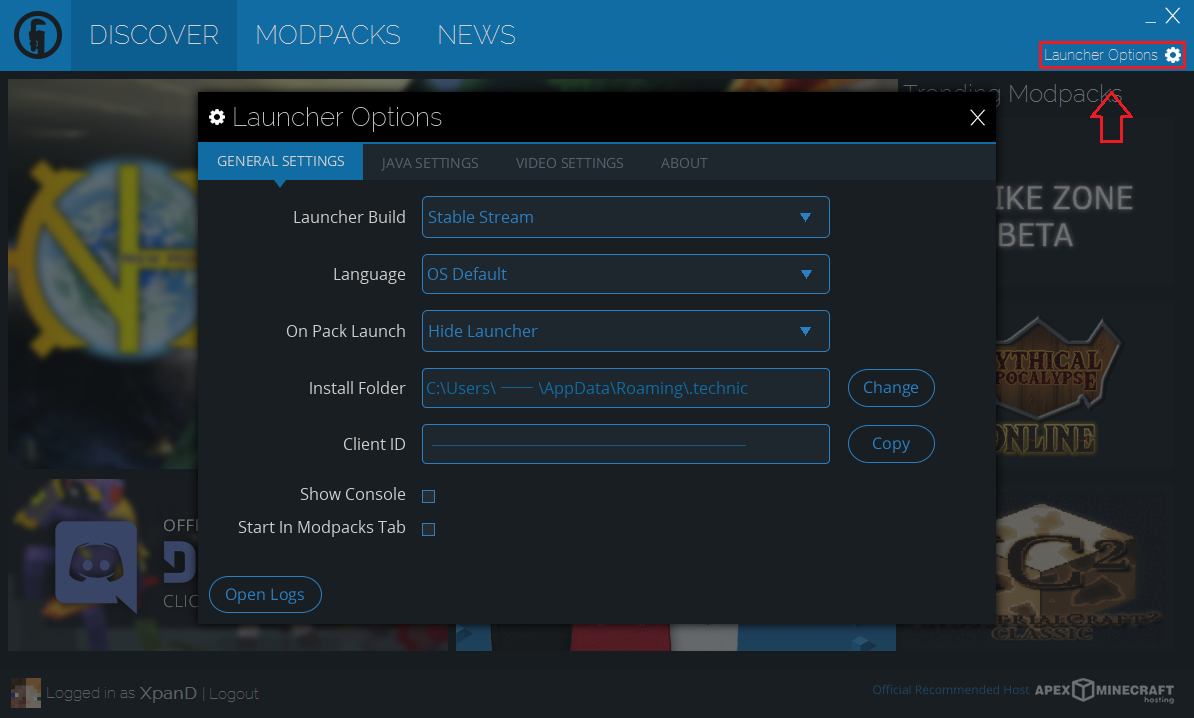
| Click on "Launcher Options". | |
| Click into the "JAVA SETTINGS" tab. | |
| Click into the "Memory" box and pick a higher setting. | |
| Click the "X" at the top right of the options window. |
Your allocation is now set, and the game should now be ready! If your launcher is not letting you allocate more than 1GB, get a 64-bit Java download for your operating system from here, and then restart your launcher.
If you get stuck on any of these steps or you are having trouble finding the right amount to allocate, feel free to ask for help in the official Pixelmon Discord.

 NodeCraft
