Join our discord
In partnership with NodeCraft Logo NodeCraft


You are not logged in! Create an account or login to contribute! Log in here!

Difference between revisions of "Translations:Visual guide to allocating RAM/3/zh-cn"

From Pixelmon Wiki
(Created page with "=== AT Launcher === {|class="mw-collapsible mw-collapsed wikitable" |- ! 步骤 ! class="unsortable" | Example |- |style="text-align:center"|启动AT Launcher。 | File:attu...")
 
 
Line 3: Line 3:
 
|-
 
|-
 
! 步骤
 
! 步骤
! class="unsortable" | Example
+
! class="unsortable" | 示例图
 
|-
 
|-
 
|style="text-align:center"|启动AT Launcher。
 
|style="text-align:center"|启动AT Launcher。
Line 14: Line 14:
 
| [[File:attutorial3.png|none|800px]]
 
| [[File:attutorial3.png|none|800px]]
 
|-
 
|-
|style="text-align:center"|Click the "Maximum Memory/Ram" box and pick a higher setting. ''Check the note at the top of this page if you're unable to allocate more than 1GB.''
+
|style="text-align:center"|点击 "最大内存/运行内存(Maximum Memory/Ram)" 下拉框并设置一个更高的内存。''如果您无法分配超过1 GB的内存,请查看本页最上方的提示。''
 
| [[File:attutorial4.png|none|800px]]
 
| [[File:attutorial4.png|none|800px]]
 
|}
 
|}

Latest revision as of 22:20, 6 May 2021

Message definition (Visual guide to allocating RAM)
=== AT Launcher ===
{|class="mw-collapsible mw-collapsed wikitable"
|-
! Step
! class="unsortable" | Example
|-
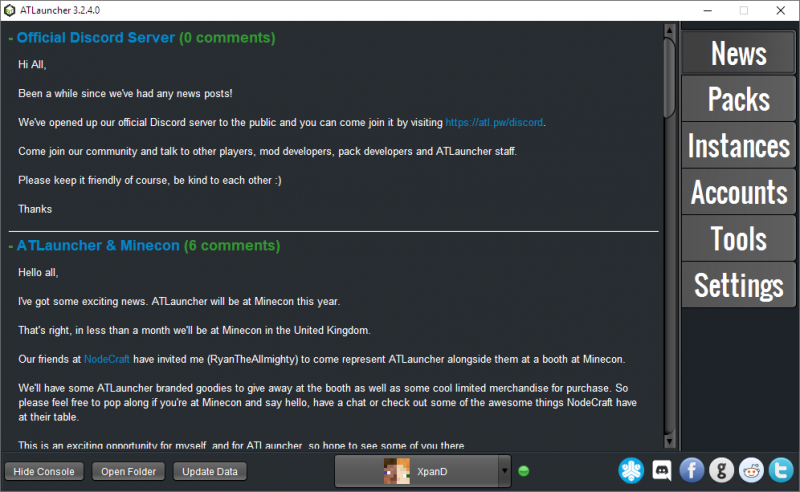
|style="text-align:center"|Start the AT Launcher.
| [[File:attutorial1.png|none|800px]]
|-
|style="text-align:center"|Click on "Settings".
| [[File:attutorial2.png|none|800px]]
|-
|style="text-align:center"|Click into the "Java/Minecraft" tab.
| [[File:attutorial3.png|none|800px]]
|-
|style="text-align:center"|Click the "Maximum Memory/Ram" box and pick a higher setting. ''Check the note at the top of this page if you're unable to allocate more than 1GB.''
| [[File:attutorial4.png|none|800px]]
|}
Translation=== AT Launcher ===
{|class="mw-collapsible mw-collapsed wikitable"
|-
! 步骤
! class="unsortable" | 示例图
|-
|style="text-align:center"|启动AT Launcher。
| [[File:attutorial1.png|none|800px]]
|-
|style="text-align:center"|点击 "设置(Settings)"。
| [[File:attutorial2.png|none|800px]]
|-
|style="text-align:center"|点击进入 "Java/Minecraft" 栏。
| [[File:attutorial3.png|none|800px]]
|-
|style="text-align:center"|点击 "最大内存/运行内存(Maximum Memory/Ram)" 下拉框并设置一个更高的内存。''如果您无法分配超过1 GB的内存,请查看本页最上方的提示。''
| [[File:attutorial4.png|none|800px]]
|}

AT Launcher

步骤 示例图
启动AT Launcher。
Attutorial1.png
点击 "设置(Settings)"。
Attutorial2.png
点击进入 "Java/Minecraft" 栏。
Attutorial3.png
点击 "最大内存/运行内存(Maximum Memory/Ram)" 下拉框并设置一个更高的内存。如果您无法分配超过1 GB的内存,请查看本页最上方的提示。
Attutorial4.png

© 2012 - 2025 Pixelmon Mod