Difference between revisions of "Iron Base"
From Pixelmon Wiki
| Line 9: | Line 9: | ||
|Output=Poké Ball | |Output=Poké Ball | ||
|OA= | |OA= | ||
| − | |nobreak=y | + | |nobreak=y|shapeless=y |
}} | }} | ||
{{Grid/Crafting Table | {{Grid/Crafting Table | ||
| Line 17: | Line 17: | ||
|Output=Great Ball | |Output=Great Ball | ||
|OA= | |OA= | ||
| − | |nobreak=y | + | |nobreak=y|shapeless=y |
}} | }} | ||
{{Grid/Crafting Table | {{Grid/Crafting Table | ||
| Line 25: | Line 25: | ||
|Output=Ultra Ball | |Output=Ultra Ball | ||
|OA= | |OA= | ||
| − | |nobreak=y | + | |nobreak=y|shapeless=y |
}} | }} | ||
{{Grid/Crafting Table | {{Grid/Crafting Table | ||
| Line 33: | Line 33: | ||
|Output=Level Ball | |Output=Level Ball | ||
|OA= | |OA= | ||
| − | |nobreak=y | + | |nobreak=y|shapeless=y |
}} | }} | ||
{{Grid/Crafting Table | {{Grid/Crafting Table | ||
| Line 41: | Line 41: | ||
|Output=Love Ball | |Output=Love Ball | ||
|OA= | |OA= | ||
| − | |nobreak=y | + | |nobreak=y|shapeless=y |
}} | }} | ||
{{Grid/Crafting Table | {{Grid/Crafting Table | ||
| Line 49: | Line 49: | ||
|Output=Heal Ball | |Output=Heal Ball | ||
|OA= | |OA= | ||
| − | |nobreak=y | + | |nobreak=y|shapeless=y |
}} | }} | ||
{{Grid/Crafting Table | {{Grid/Crafting Table | ||
| Line 57: | Line 57: | ||
|Output=Fast Ball | |Output=Fast Ball | ||
|OA= | |OA= | ||
| − | |nobreak=y | + | |nobreak=y|shapeless=y |
}} | }} | ||
{{Grid/Crafting Table | {{Grid/Crafting Table | ||
| Line 65: | Line 65: | ||
|Output=Repeat Ball | |Output=Repeat Ball | ||
|OA= | |OA= | ||
| − | |nobreak=y | + | |nobreak=y|shapeless=y |
}} | }} | ||
{{Grid/Crafting Table | {{Grid/Crafting Table | ||
| Line 73: | Line 73: | ||
|Output=Timer Ball | |Output=Timer Ball | ||
|OA= | |OA= | ||
| − | |nobreak=y | + | |nobreak=y|shapeless=y |
}} | }} | ||
{{Grid/Crafting Table | {{Grid/Crafting Table | ||
| Line 81: | Line 81: | ||
|Output=Nest Ball | |Output=Nest Ball | ||
|OA= | |OA= | ||
| − | |nobreak=y | + | |nobreak=y|shapeless=y |
}} | }} | ||
{{Grid/Crafting Table | {{Grid/Crafting Table | ||
| Line 89: | Line 89: | ||
|Output=Heavy Ball | |Output=Heavy Ball | ||
|OA= | |OA= | ||
| − | |nobreak=y | + | |nobreak=y|shapeless=y |
}} | }} | ||
{{Grid/Crafting Table | {{Grid/Crafting Table | ||
| Line 97: | Line 97: | ||
|Output=Net Ball | |Output=Net Ball | ||
|OA= | |OA= | ||
| − | |nobreak=y | + | |nobreak=y|shapeless=y |
}} | }} | ||
{{Grid/Crafting Table | {{Grid/Crafting Table | ||
| Line 105: | Line 105: | ||
|Output=Dive Ball | |Output=Dive Ball | ||
|OA= | |OA= | ||
| − | |nobreak=y | + | |nobreak=y|shapeless=y |
}} | }} | ||
{{Grid/Crafting Table | {{Grid/Crafting Table | ||
| Line 113: | Line 113: | ||
|Output=Dusk Ball | |Output=Dusk Ball | ||
|OA= | |OA= | ||
| − | |nobreak=y | + | |nobreak=y|shapeless=y |
}} | }} | ||
{{Grid/Crafting Table | {{Grid/Crafting Table | ||
| Line 121: | Line 121: | ||
|Output=Moon Ball | |Output=Moon Ball | ||
|OA= | |OA= | ||
| − | |nobreak=y | + | |nobreak=y|shapeless=y |
}} | }} | ||
{{Grid/Crafting Table | {{Grid/Crafting Table | ||
| Line 129: | Line 129: | ||
|Output=Premier Ball | |Output=Premier Ball | ||
|OA= | |OA= | ||
| − | |nobreak=y | + | |nobreak=y|shapeless=y |
}} | }} | ||
{{Grid/Crafting Table | {{Grid/Crafting Table | ||
| Line 137: | Line 137: | ||
|Output=Luxury Ball | |Output=Luxury Ball | ||
|OA= | |OA= | ||
| − | |nobreak=y | + | |nobreak=y|shapeless=y |
}} | }} | ||
{{Grid/Crafting Table | {{Grid/Crafting Table | ||
| Line 145: | Line 145: | ||
|Output=Friend Ball | |Output=Friend Ball | ||
|OA= | |OA= | ||
| − | |nobreak=y | + | |nobreak=y|shapeless=y |
}} | }} | ||
{{Grid/Crafting Table | {{Grid/Crafting Table | ||
| Line 153: | Line 153: | ||
|Output=Safari Ball | |Output=Safari Ball | ||
|OA= | |OA= | ||
| + | |shapeless=y | ||
}} | }} | ||
Revision as of 21:28, 19 June 2014
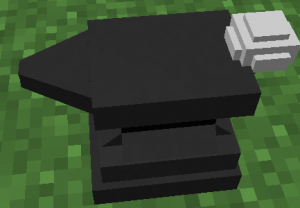
An Iron Base is created by placing an Iron Disc on an Anvil (by right-clicking on Anvil when holding the Disc), then using a hammer (holding left-click) on the Anvil. Eventually, the Disc will turn into an Iron Base, which can be right-clicked to be re-obtained. The iron base is used to make every type of Poké Ball.

 NodeCraft

