Difference between revisions of "Visual guide to allocating RAM"
m |
m (Updated for 6.2.3's lowered memory requirements. Also, added an SEO tag.) |
||
| Line 1: | Line 1: | ||
| − | By default, Minecraft starts up with only 1GB of memory to work with. [[Pixelmon]] | + | <seo metakeywords="Pixelmon, Reforged, RAM, memory, Java, allocate, allocating, allocation, 1GB, lag, mod, mods" metadescription="A visual guide to giving the game more memory on different launchers."/> |
| + | By default, Minecraft starts up with only 1GB of memory to work with. While [[Pixelmon]] should work alright on the default allocation (as of 6.2.3), you may still wish to allocate more, especially when also running other mods. This quick guide will guide you through the process. | ||
== Minecraft launcher == | == Minecraft launcher == | ||
| Line 53: | Line 54: | ||
| − | Your allocation is now set, and | + | Your allocation is now set, and should be ready to use! If your launcher is not letting you allocate more than 1GB, get a 64-bit Java download for your operating system from [https://java.com/en/download/manual.jsp here], and then restart your launcher. |
If you get stuck on any of these steps, or you are having trouble finding the right amount to allocate or getting the game to perform smoothly, feel free to ask for help in the official [[Pixelmon Discord]]. | If you get stuck on any of these steps, or you are having trouble finding the right amount to allocate or getting the game to perform smoothly, feel free to ask for help in the official [[Pixelmon Discord]]. | ||
Revision as of 07:17, 1 May 2018
By default, Minecraft starts up with only 1GB of memory to work with. While Pixelmon should work alright on the default allocation (as of 6.2.3), you may still wish to allocate more, especially when also running other mods. This quick guide will guide you through the process.
Minecraft launcher
| Step | Example |
|---|---|
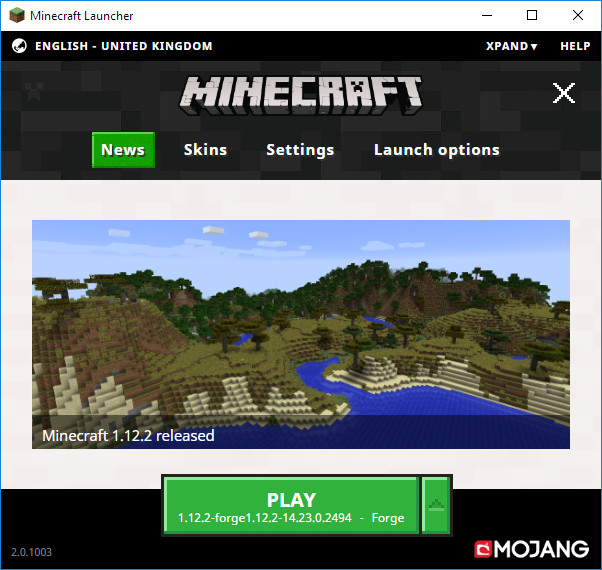
| Start the Minecraft launcher. | |
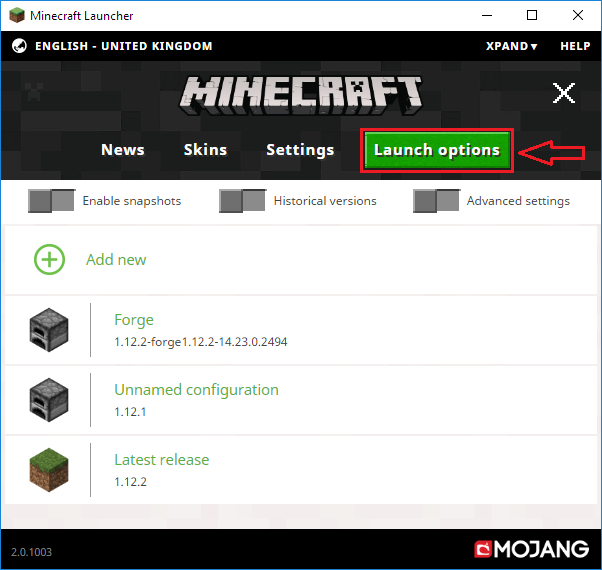
| Click on "Launch options". | |
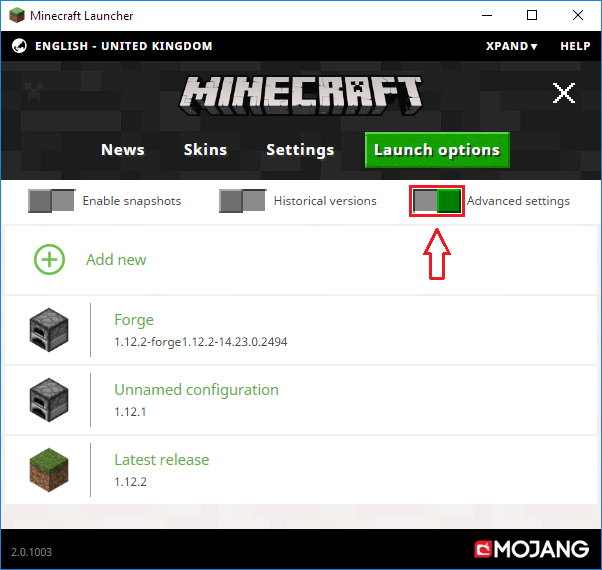
| Click on "Advanced settings". | |
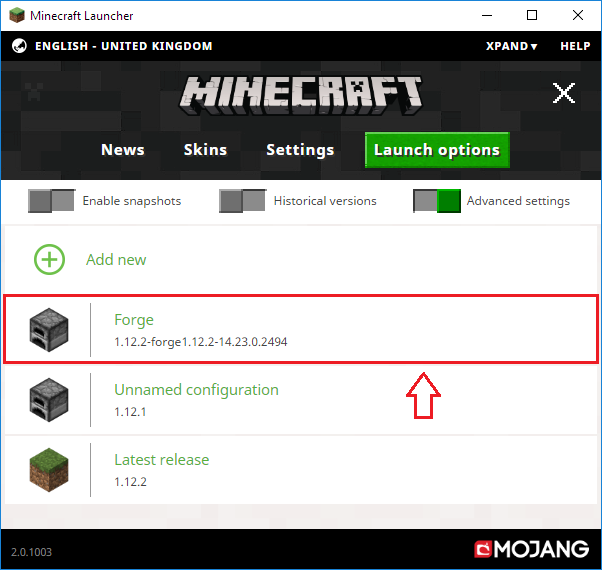
| Click on your Pixelmon Forge profile. | |
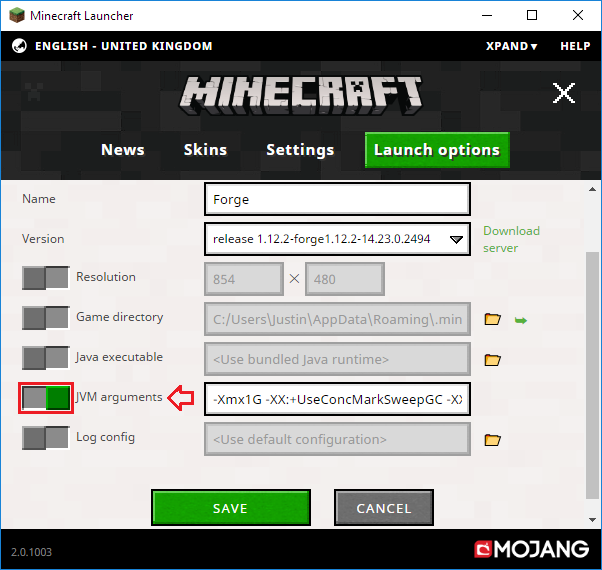
| Click on "JVM Arguments". | |
| Replace "-Xmx1G" with a higher amount,
such as "-Xmx3G" (or "-Xmx3000M") |
|
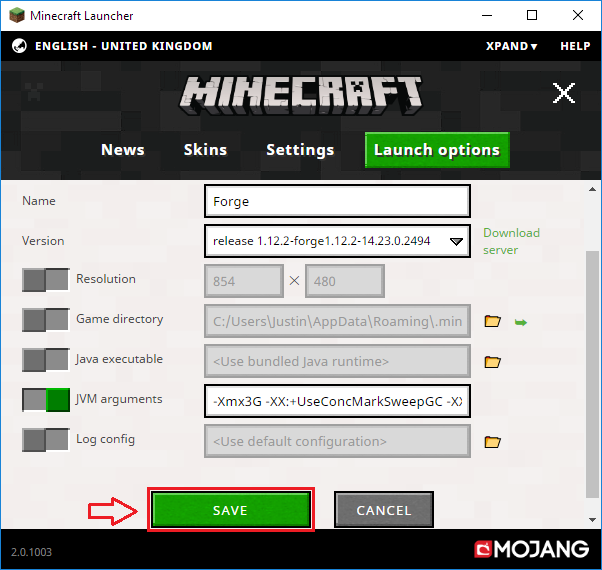
| Click "SAVE" to save your settings. |
Technic launcher
| Step | Example |
|---|---|
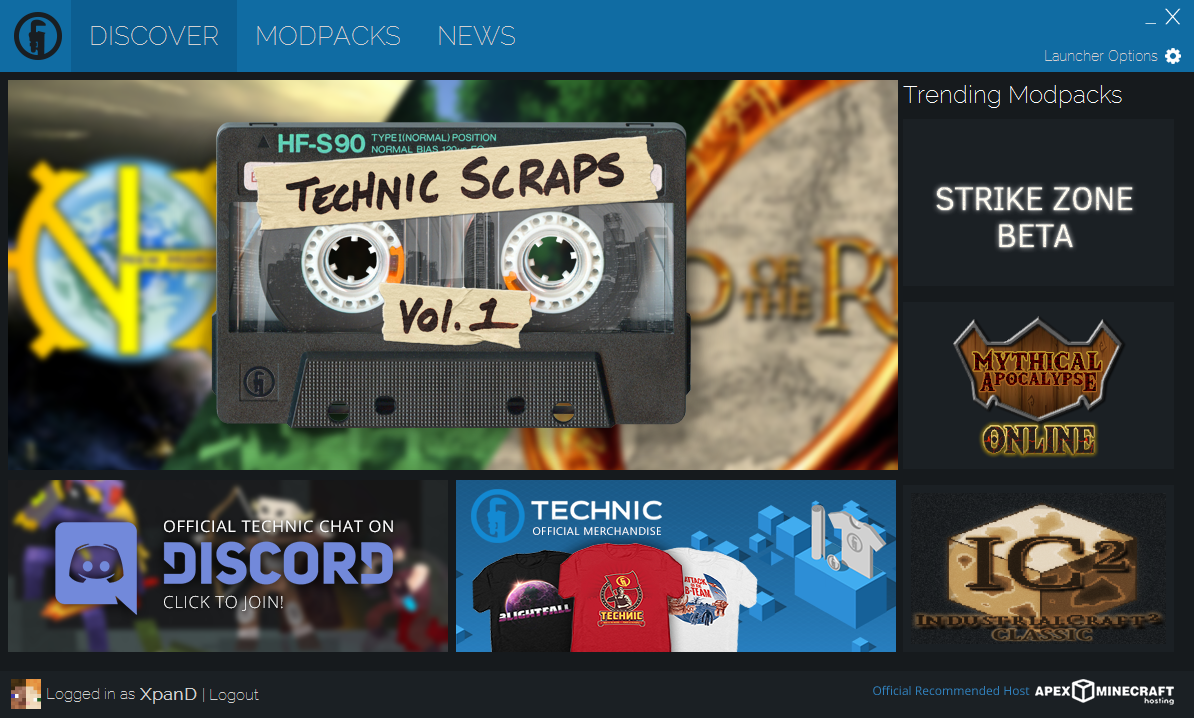
| Start the Technic launcher. | |
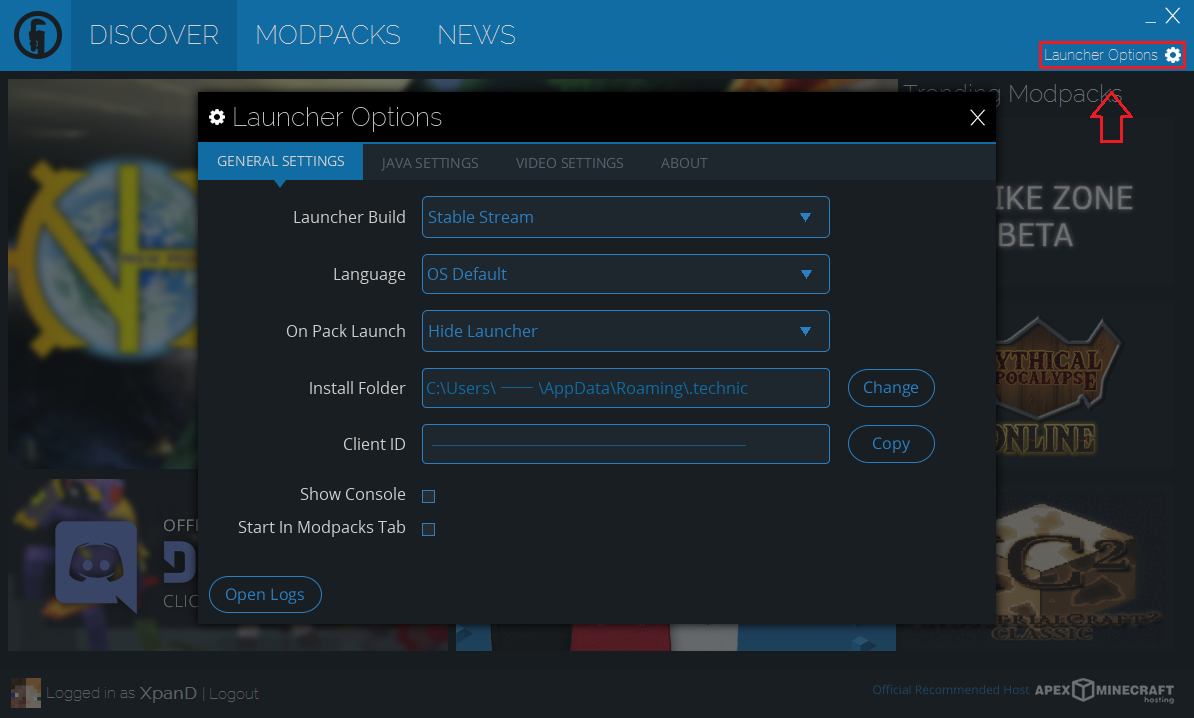
| Click on "Launcher Options". | |
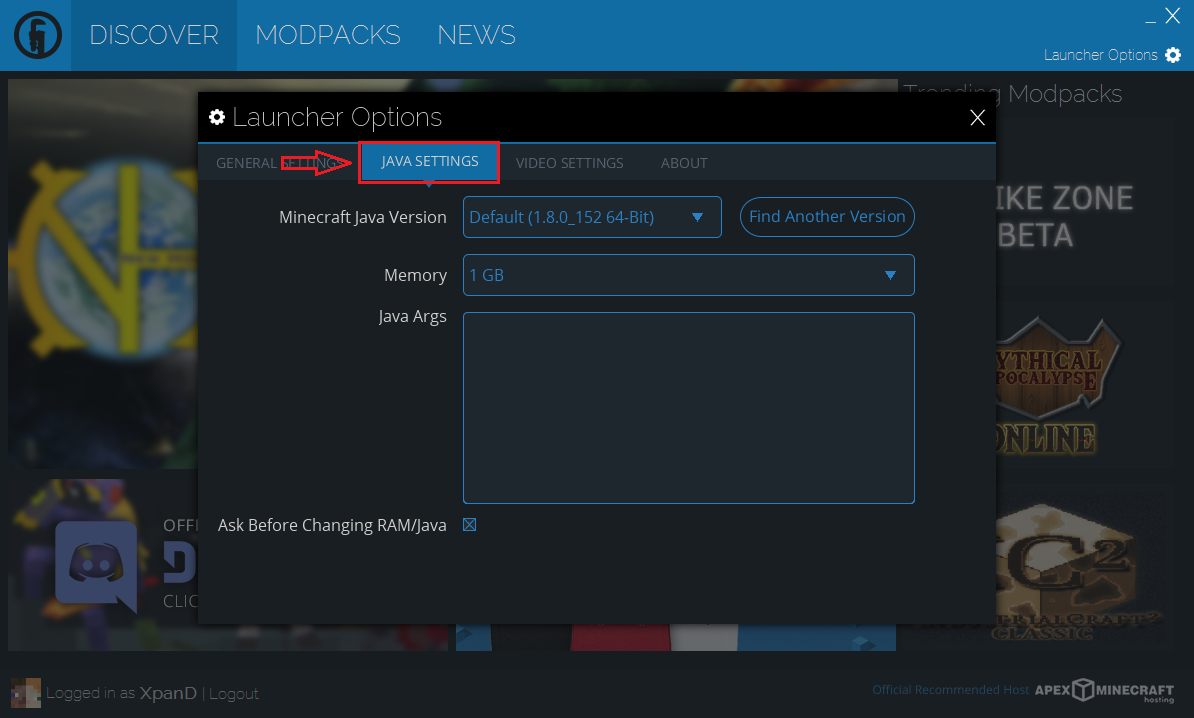
| Click into the "JAVA SETTINGS" tab. | |
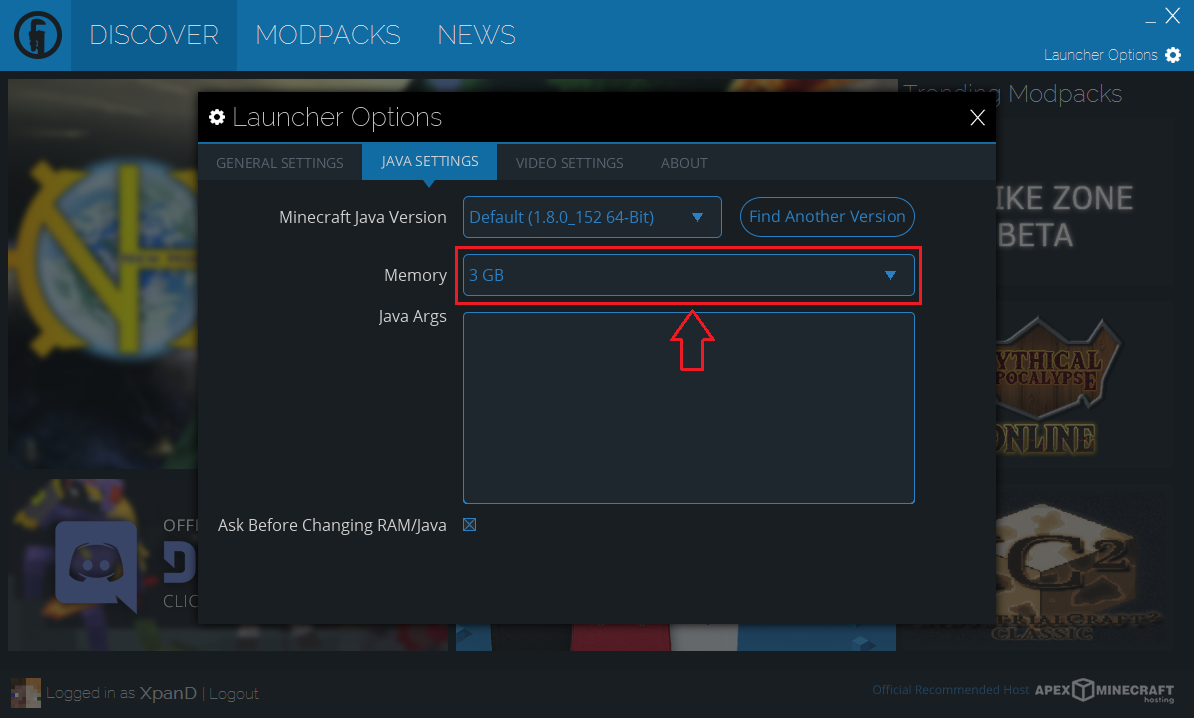
| Click the "Memory" box and pick a higher setting. | |
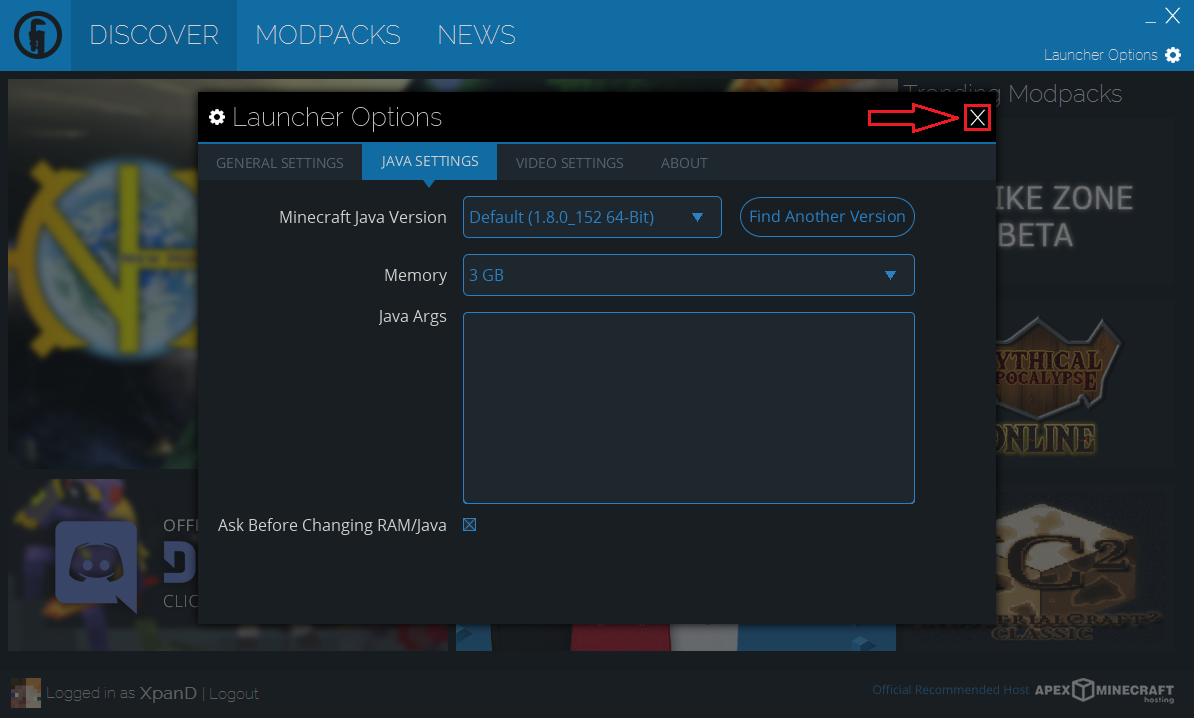
| Click the "X" at the top right of the options window. |
Your allocation is now set, and should be ready to use! If your launcher is not letting you allocate more than 1GB, get a 64-bit Java download for your operating system from here, and then restart your launcher.
If you get stuck on any of these steps, or you are having trouble finding the right amount to allocate or getting the game to perform smoothly, feel free to ask for help in the official Pixelmon Discord.

 NodeCraft
