Structure Editing
The NBT Files of Structures can be created or edited using Minecraft's Structure Blocks. This can be used to archive builds, share them, or use them via Data Pack.
Contents
Loading existing Structures
When modifying an existing Structure Template, you need to first load in the one you want to edit.
- Give yourself a Structure Block using
/give <player> minecraft:structure_block. - Place the Structure Block in an area that has enough space to load the Structure in question.
- Unless specified differently using the "Relative Position" settings in the UI, Structures are always loaded with the northwest corner on top of of the Structure Block's position - meaning you will need enough space to the east and south.
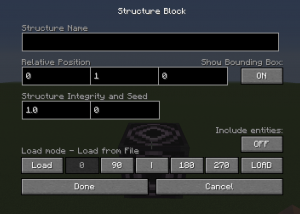
- Open the Structure Block's UI and cycle to the "Load mode" using the button in the bottom left.
- Enter the Namespaced Path for the Structure you want to load into the "Structure Name" field.
- If the Structure Template contains entities (like NPCs, Raid Dens, or Item Frames/Paintings) set the "Include entities:" option to "ON".
- If you're unsure if the Structure in question contains entities, it's better to activate this setting, even if it may not be relevant.
- Click the "LOAD" button on the bottom right once to show the Structure outline.
- This visualizes where the build will be loaded in exactly and can be moved via the "Relative Position" values before applying.
- Important! To preserve the Structure Voids in the Template, fill the entire structure outline with
minecraft:structure_voidbefore fully loading it in.- These technical blocks determine which blocks will not be replaced when the Structure is generated in. They are important to integrate the build into terrain while still allowing for explicit air pockets. However, they're also applied when loaded in via Structure Block - so in order to save the Structure Template back out with valid Voids, they need to be preserved manually like this.
- Click "LOAD" a second time to fully load the Structure in.
To save your edited version of a Structure Template out again you can simply cycle the Structure Block to "Save mode" using the button in the bottom left. All important settings will be preserved and you can continue with "Exporting a Structure Template" below.
Applying Structure Blocks to a new Structure
To save a Structure, it needs to be defined using a Structure Block in "Save mode". This "Save" Block can be placed anywhere near the Structure itself as long as it isn't directly inside the area you want to save.
Note: When first placed, a Structure Block will default to "Data Mode". To switch to "Save Mode", cycle through the modes using the button in the bottom left until it says "Save".
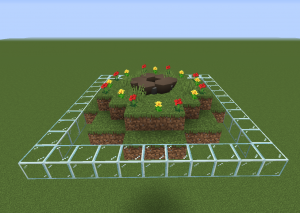
However, when you're building for the explicit purpose of saving and exporting the Structure Template, it's recommended to prepare a good area beforehand. A plot border at ground level for example gives context while building and allows planning the size of the Structure beforehand. It also offers a good spot to place the "Save" Block.
With Corners
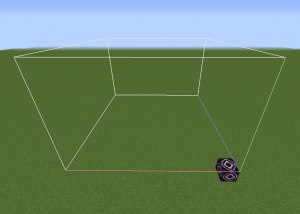
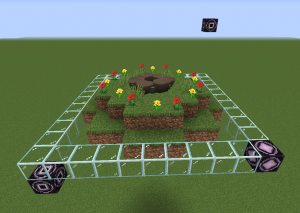
An easy way to define the area of your structure is by using Structure Blocks in "Corner mode". These can be placed around your structure and allow the "Save" Block to automatically detect the outline.
This guide will cover using two corners. While it is possible to use just one, or more than two, using two corners is the most flexible and unambiguous variant.
- Identify the extent of your Structure.
- Place a Structure Block one block outside of that area in all 3 dimensions.
- For example to denote the upper south-east corner, place it one block further up than the highest block in your structure, one block further south than the south-most edge and one block further east than the east-most block.
- Cycle this Structure Block to "Corner mode" using the button in the bottom left.
- Enter your build's Namespaced Path in the "Structure Name" field.
- Repeat Steps 2-4 for the opposite corner.
- So if your first corner was the upper south-east, the opposite one would be the lower north-west.
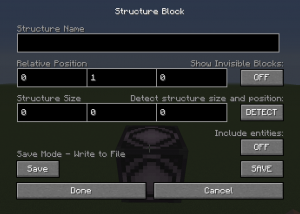
- Once both corners are set up, open the "Save" Block's UI again and press the "DETECT" button.
- This will automatically fill the "Relative Position" and "Structure Size" fields to correspond to the area between the "Corner" Blocks.
Without Corners
The Structure Outline can also be defined without using "Corner" Blocks, by setting the values for "Relative Position" and "Structure Size" manually:
- Measure the size of your build in all three dimensions.
- Open the "Save" Block's UI and enter these values into the respective fields under "Structure Size" and apply them via the "Done" button.
- You will see an outline the size of your Structure. However, it may be offset from the actual build itself. If so, measure this offset in all three dimensions.
- Open the "Save" Block's UI and enter these values into the respective fields under "Relative Position" and apply them via the "Done" button.
- Check if the outline lines up with your build, and if necessary repeat the above steps until it does.
Structure Voids
Structure Voids are technical blocks that help integrate Structure Templates into existing terrain when loaded in. Each block that contains a Structure Void will not replace whatever block existed in that coordinate before the Structure was loaded in.
This comes in handy for builds that extend underground or underwater, allows additional elements to be generated into Structures without overriding too much, and in general help make World Generation look more natural.
Where to place Structure Voids?
Generally, all empty spaces that don't explicitly need to be air for the Structure to function should be replaced with Structure Voids. The same goes for any terrain around the structure itself.
But there are a number of aesthetic considerations where you may want to deviate from that guideline. The following examples will cover some common cases:
Example 1: A House
In general, all "empty" blocks outside the house should be Structure Voids, while the interior needs to stay air. However, there are some exceptions to this:
- All entrances should stay functional. This means there needs to be at least an air pocket in front of each.
- Any paths - like one leading up to the front door or garden - need to stay usable and should have enough air above/around them to still be walkable.
- Balconies, gardens and similarly open areas need an air pocket large enough to walk, and preferably accomodate any decoration they may have. If there is a roof directly above, you can keep the entire area between those air.
- One block outside windows (and 1-2 blocks above that) can be left as air. This is optional, but it will create lightshafts for these windows in case the Structure is generated into sloping terrain.
Make sure to give all these air pockets a somewhat "rounded" shape where possible, so any edge they may create will have a more natural look.
Example 2: A Raid Den
The only area in this that strictly needs to be air is a pocket right above the Den itself, so it stays visible however it generates. Things to consider here are how it integrates into natural terrain:
- Only keep terrain that is absolutely necessary to achieve the desired effect. The rest can be replaced with Structure Voids.
- Dirt and sand should be rounded off to integrate more organically. Rocks can work with sharp edges in some cases.
- The air Pocket above the Den should be believable in any terrain. So making it funnel shaped can cut a slope down, in case the den generates slightly below surface level. If the overall structure is high enough, it should also be rounded off to the top in case it generates partially into a cliff wall.
Example 3: An open Structure
This includes things like parks, plazas, statues or mechanical buildings. These should have an air pocket fitting their respective size and purpose:
- Any area below a Tree's canopy should stay air. While it may be conceivable that a tree may have grown up and under a rock, growing into/through it makes less sense.
- This air pocket can be rounded out towards the bottom if appropriate, where a slope won't hinder the tree.
- A statue is meant to be visible, and should have a decent air buffer all around. Especially near the base, sloping up to the top, so onlookers can look up at it.
- Functional looking parts (such as windmills or cranes) need enough free air to fulfill their purpose.
- Over a larger accessible area, a lightly sloping dome shape helps to make it feel natural. Unless necessitated by other aspects, this ceiling doesn't need to be too high in most cases though.
- Old ruins on the other hand can believably be partially covered by terrain, so only the important areas really need air pockets.
- Smooth out or extend the areas between such features, as well as from walls to the ground, to create a naturally believable overall shape. Caves and terrain formations may be a good inspiration.
In general: Air should be kept to a minimum - but ask yourself: "If all of these Structure Voids were terrain blocks, could this Structure still fulfill its intended purpose?"
Tips & Tricks
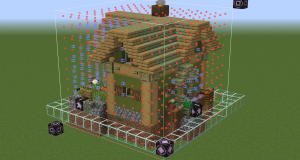
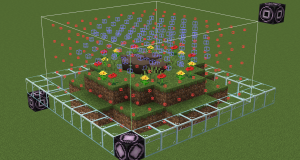
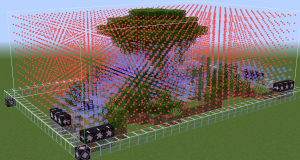
Since Structure Voids are invisible (aside from the block outline seen when looking directly at one), Structure Blocks have the "Show Invisible Blocks" toggle. This shows normally invisible (Vanilla) blocks using differently colored cube outlines. Air for example shows in light blue and Structure Voids in red.
This setting is however pretty resource intensive and larger builds can cause considerable lag for clients.
Instead you could use another block as placeholder. This needs to be one not actively used in your build, and should be easy to distinguish from your building blocks. These placeholder blocks can then later be replaced with Structure Voids before exporting it - for example via Vanilla Minecraft's /fill command (using a filter) or the WorldEdit mod's //replace.
For some builds it may even be easier to explicitly place blocks where you do want to be air in the final Structure. You can then first replace the remaining air blocks across your Structure Template with Structure Voids, and then afterwards replace your placeholder blocks with air.
Window 1 used as a placeholder for Structure Voids.
Exporting a Structure Template
To be able to share Structures or use them in Data Packs, they need to be saved as an NBT file. Structure Blocks in "Save Mode" will do just that.
Saving the Structure
Before actually saving out a Structure Template, there are settings you need to pay attention to:
First is the "Structure Name" field. It needs to contain a Namespaced Path which will determine where exactly the file is saved to.
While it can be changed after exporting by simply moving the file to a different location in a Data Pack, it's recommended to choose this path while saving. It will make exporting multiple Structures into a Data Pack easier, avoids confusion if you want to make changes to the Template later, and allows you to prepare Template Pool files using these values for World Generation.
The second setting is the "Include entities:" toggle. It defaults to "OFF" - so if your build contains any entities you want to export along with the rest of the Structure, make sure to change this to "ON".
This affects anything not bound by the block grid (Mobs, NPCs, Raid Dens, Armor Stands, Boats/Minecarts, etc.) as well as certain "block entities", such as Item Frames and Paintings. If kept on "OFF", none of these will be present in your saved Structure Template.
If your Structure is set up to your liking, you can now save it out by clicking the "SAVE" button in the bottom right of the Structure Block's UI. A chat message will confirm a successful export.
Finding the Files
Exporting a Structure Template via Structure Block will save it as an NBT file in the respective world's files.
Note: For sake of brevity this guide assumes you know where those files are located. If not, you can follow this article that covers the file locations for all systems - just instead of the last (config-specific) step, navigate to saves\<world name>\.
Inside the world's directory, you will find a folder called generated. This is where the game saves any files exported via Structure Block. These will be located under the paths you chose in the "Structure Name" field, resolved following the pattern used for Namespaced Paths.
This means if you want your Data Pack to contain all exported Structure Templates from this world, using the same Structure Names, you can simply copy the contents of your world's generated folder into your Data Pack's data folder.
Namespaced Paths
When referring to Asset and Data files, Minecraft uses a shortened version of the path the respective file is located under. It uses the format <namespace>:[subfolders]<file name>.
Namespace
The <namespace> part of the format refers to the name for the file set the respective files fall under. For mod files this is usually their mod ID and Vanilla files use minecraft. This is no hard rule however, and files can be added under and loaded from any namespace, as long as that is considered correctly in all places that refer to them.
It corresponds to the name of the folder inside the data directory of a Data Pack or mod (or assets in a Resource Pack/mod if referring to those).
Pixelmon uses the pixelmon namespace for anything concerning the main mod and tcg for aspects that specifically affect the TCG.
Relative Path
Namespaced Paths always assume the root of the relative path based on context. So since the Structure Block expects the location of a Structure Data file, it already knows to look inside data\<namespace>\structures\.
The same goes for the file extension. Only NBT files can be loaded via Structure Block, so the Namespaced Path doesn't need to include that.
So for the TCG Shop structure of the Grass Gym village (found under data\pixelmon\structures\gyms\grass\gym_grass_tcg_shop.nbt) you would only need to list the subfolders under structures, separated by forward slashes (so gyms/grass/) and the file name without extension (gym_grass_tcg_shop). Combined with the mod's namespace, that gives us the Namespaced Path pixelmon:gyms/grass/gym_grass_tcg_shop.
Examples
| file path inside mod/Data Pack | Namespaced Path |
|---|---|
data\pixelmon\structures\boats\boat_magikarp.nbt |
pixelmon:boats/boat_magikarp
|
data\pixelmon\structures\npc\shopkeeper\main_1.nbt |
pixelmon:npc/shopkeeper/main_1
|
data\pixelmon\structures\ultra_space\grotto\crater\ultra_crater_grotto_a.nbt |
pixelmon:ultra_space/grotto/crater/ultra_crater_grotto_a
|
data\minecraft\structures\village\plains\town_centers\plains_meeting_point_1.nbt |
minecraft:village/plains/town_centers/plains_meeting_point_1
|
Note: The exact behavior listed here only applies when referring to Structure files. In different context the Namespaced Path will assume a different root location. It can happen that the same Namespaced Path will refer to different files when used in different locations.pixelmon:block/boxfor example is valid in both the context of a block model, as well as that of a texture - assuming eitherassets\pixelmon\models\block\box.jsonorassets\pixelmon\textures\block\box.pngrespectively.

 NodeCraft
