默认地,Minecraft只会以1 GB的运行内存来启动。虽然Pixelmon可能能够以默认分配的内存来运行,但分配更多的内存往往能够帮助提高性能和稳定性。对于同时运行了其他模组的情况来说尤其如此。此快速指南将会通过过程一步步指导您。
卡在了1 GB内存? 一个64位Java的安装需要能够分配至少1 GB的运行内存。您可以通过点击此链接为操作系统获取一个64位的Java。如果您运行的是Windows操作系统,请确保您获取的是Java 64位 Windows 离线版!请在更新后重启您的启动器。
AT Launcher
| 步骤 | 示例图 |
|---|---|
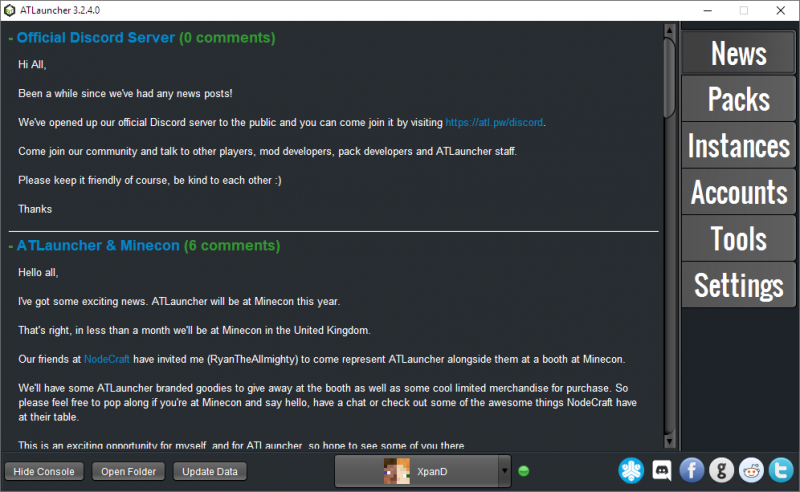
| 启动AT Launcher。 | |
| 点击 "设置(Settings)"。 | |
| 点击进入 "Java/Minecraft" 栏。 | |
| 点击 "最大内存/运行内存(Maximum Memory/Ram)" 下拉框并设置一个更高的内存。如果您无法分配超过1 GB的内存,请查看本页最上方的提示。 |
Technic launcher
| Step | Example |
|---|---|
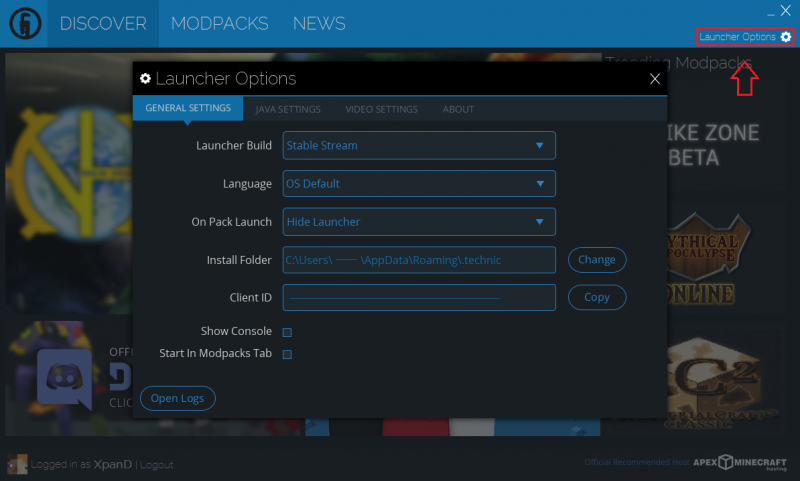
| Start the Technic launcher. | |
| Click on "Launcher Options". | |
| Click into the "JAVA SETTINGS" tab. | |
| Click the "Memory" box and pick a higher setting. Check the note at the top of this page if you're unable to allocate more than 1GB. |
Minecraft launcher
| Step | Example |
|---|---|
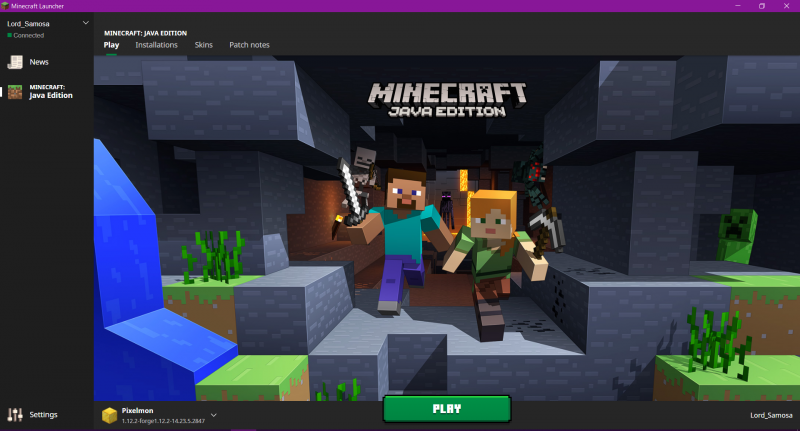
| Start the Minecraft launcher. | |
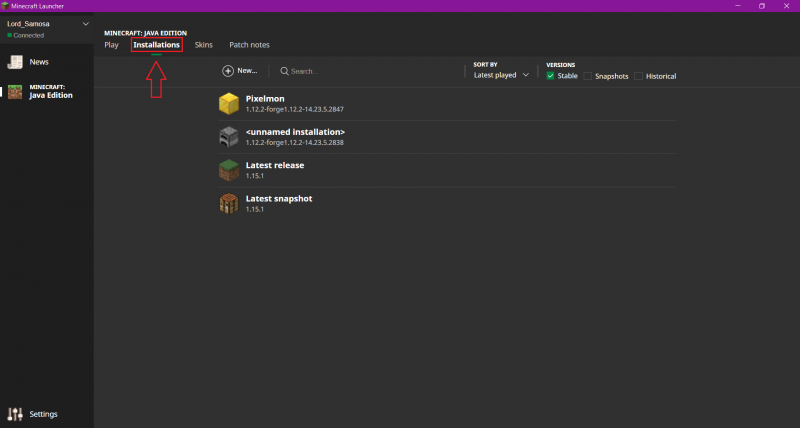
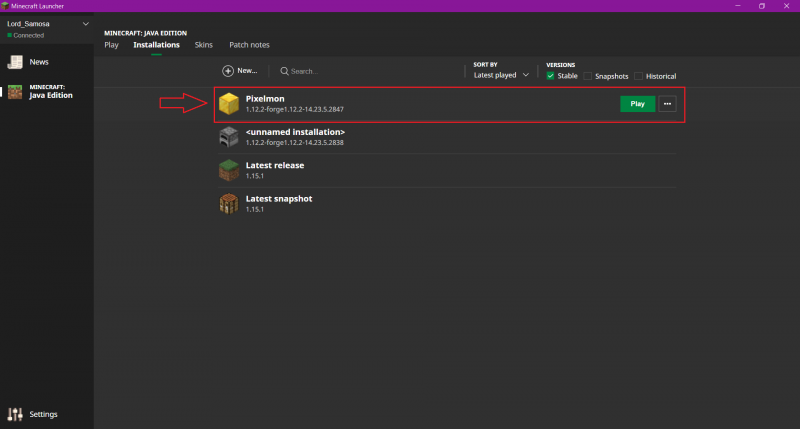
| Click on "Installations". | |
| Click on your Pixelmon Forge profile. | |
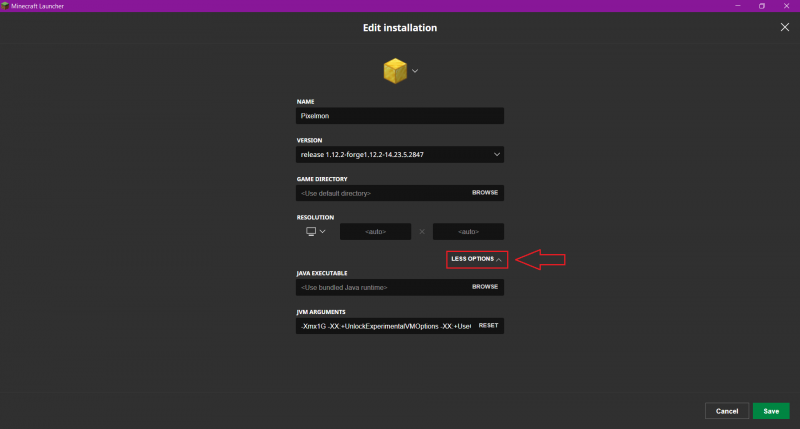
| Click More options. | |
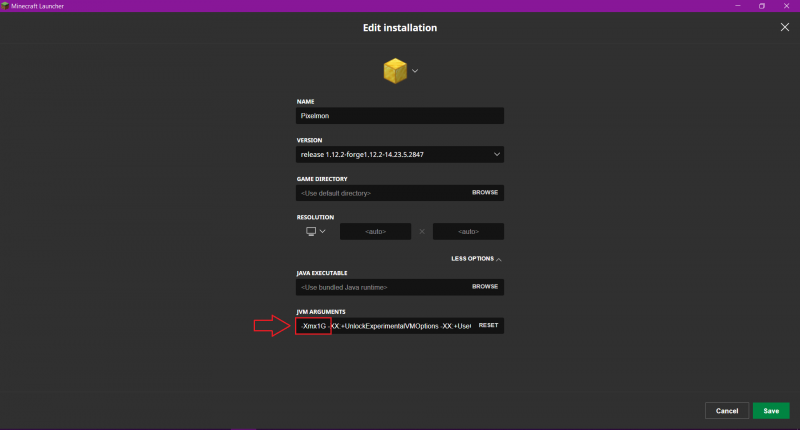
| Replace "-Xmx1G" with a higher amount,
such as "-Xmx3G" (or "-Xmx3000M"). |
|
| Click "SAVE" to save your settings |
If you get stuck on any of these steps, or are having trouble finding the right amount to allocate or getting the game to run smoothly, check out the Fixing memory issues page or ask for help in the official Pixelmon Discord.

 NodeCraft
